
Table of Contents
11th Jan, 2025 by: Himalayan Magic Treks
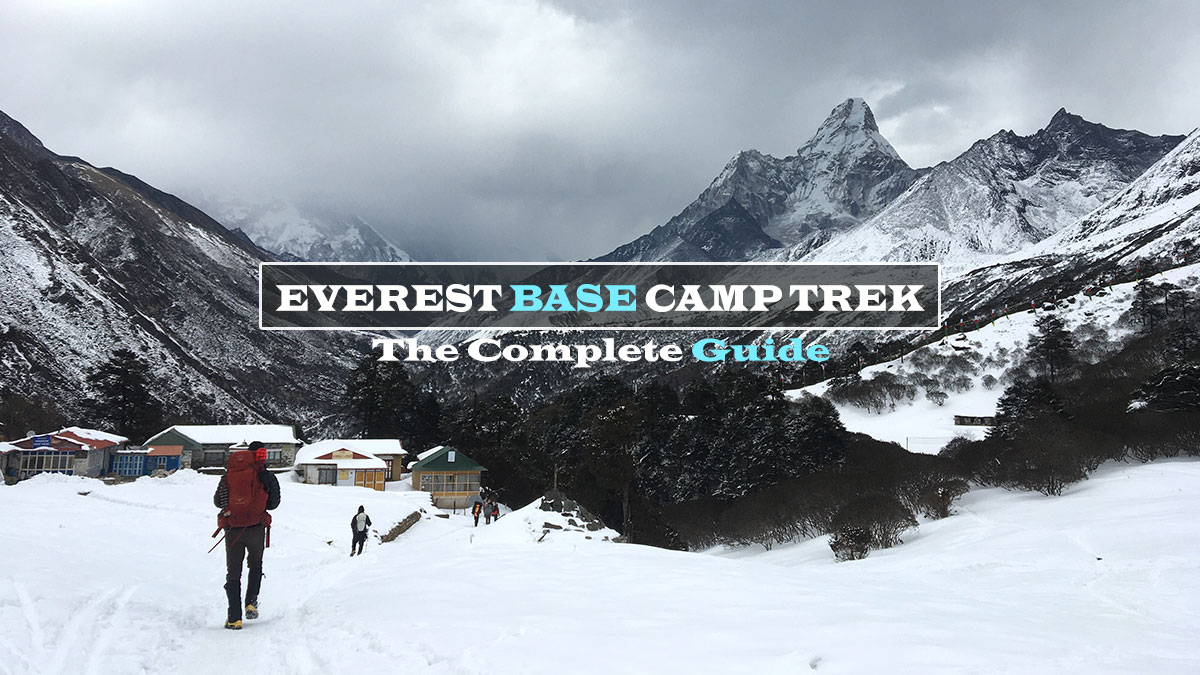
Everest Base Camp Trek - A complete Guide
Everest Base Camp Trek – Journey to the Roof of the World: The Everest Base Camp Trek (EBC) is one of the world’s most iconic trekking destinations. Everest Base Camp taking you deep into the heart of the Khumbu region of Nepal and to the base of the highest mountain on Earth, Mount Everest (8,848.86 m / 29,032 ft). Known locally as Sagarmatha in Nepali and Chomolungma in Sherpa culture, Everest is a symbol of natural beauty, adventure, and human achievement. This unforgettable Himalayan journey combines breathtaking mountain scenery, authentic Sherpa culture, ancient monasteries, and thrilling high-altitude trekking. Every year, thousands of trekkers from around the world visit Everest Base Camp to experience the legendary trails pioneered by Sir Edmund Hillary and Tenzing Norgay Sherpa.
The Everest Base Camp Trek begins with an exciting flight from Kathmandu to Lukla, one of the most scenic mountain air routes in the world. From Lukla, the trail winds through picturesque Sherpa settlements, suspension bridges decorated with prayer flags, alpine forests, glacial rivers, and dramatic Himalayan landscapes. Along the route, trekkers pass through famous villages such as Phakding, Namche Bazaar, Tengboche, Dingboche, and Lobuche before finally reaching the legendary Everest Base Camp. A sunrise hike to Kala Patthar offers one of the finest close-up panoramic views of Mount Everest and surrounding Himalayan giants. Everest Base Camp Trekking in general takes 12–14 days, allowing proper acclimatization for a safe and enjoyable adventure. It is ideal for trekkers seeking a combination of mountain adventure, cultural exploration, and once in a lifetime experiences.
The Everest Base Camp Trek (EBC) offer remarkable natural beauty of elevated Himalaya’s of Nepal. Kalapatthar is the highest point of sunrise and sunset view of world tallest Mount Everest 8848.86 meters on this planet. The Khumbu region is established high mountains standing with stunning snowcapped peaks conquer high altitude for those mountain expeditions and experience trekking and climbing every year. Thousands of trekkers visit Everest Base Camp each season to observe the pure mountains as well as Sherpa inhabitants during the hiking with different test of life. There are several villages providing a pure landscapes and panoramic view of , meet international peoples during tea house stays. Daily Distances travel on the Everest Base Camp Trek 14 day’s full guided trek in Nepal that takes you to Everest Base Camp (5,364 m) and Kala Patthar (5,545m). The total distance of Everest Base Camp (EBC) trek is approximately 130 kilometers (80 miles) round trip from Lukla Airport. This Everest Base Camp Trekking follows faithfully in the footsteps of Hillary and Tenzing, allowing plenty of time to well acclimatize and enjoy the incredible Nepal expert-led treks across the high Himalayas. Choose now for safe, scenic, and locally guided adventures with a legendary journey to the foot of the planet's highest peak in the world Mount Everest (8,848.86 meters / 29,032 feet) one of the most popular trekking routes in Nepal. Everest Base Camp Trek leading by thousands of trekkers to visit every year which Includes accommodations, Guide, Porters, flights, permits, and expert guides as well as safety to covers insurance for the workers during the trek with very reasonable costs. What’s you feel the different with our packages comparing other competitors and also an experience team to lead the group perfectly. We are well reputed travel organizer since long period of time; we give you the test of happiness with full satisfaction while you brought the trip with us locally.
Everest Base Camp Trek start the journey to touch the Roof of the World!! The Everest Base Camp Trek is a once in a lifetime adventure into the heart of the Khumbu region, leading you to the base of the world’s highest peak, Mount Everest (8,848 m). Known as Sagarmatha in Nepali and Chomolungma in Sherpa culture, Everest stands as a symbol of natural grandeur and human achievement. The journey begins with a scenic flight from Kathmandu to Lukla, followed by a trek through traditional Sherpa villages, ancient monasteries, and the pristine landscapes of Sagarmatha National Park. Along the trail, you’ll cross iconic suspension bridges, walk beside glacial rivers, and witness breathtaking Himalayan panoramas. Major highlights include Namche Bazaar, the cultural hub of the Everest region, Tengboche Monastery with its stunning mountain backdrop, and the legendary Everest Base Camp. A hike to Kala Patthar (5,545 m) offers one of the best panoramic views of Everest, Lhotse, Nuptse, and Ama Dablam. This 12–14 day trek is perfect for adventure lovers seeking high-altitude landscapes, rich Sherpa culture, and unforgettable mountain views all within a limited timeframe.
The Everest Base Camp Trek is a life-changing adventure, offering a blend of breathtaking landscapes, cultural encounters, and the thrill of standing in the shadow of the world’s highest peak. To provide a comprehensive and enriching experience, here's a breakdown of the best content for this trek, covering everything from the key highlights and tips to useful resources for planning your journey.
Trek Highlights
→ Daily Scenic mountain flights from Kathmandu to Lukla
→ Trek through the world-famous Khumbu region
→ Explore traditional Sherpa villages and local culture
→ Visit the vibrant Namche Bazaar
→ Experience the spiritual atmosphere of Tengboche Monastery
→ Reach Everest Base Camp (5,364 m)
→ Hike to Kala Patthar (5,545 m) for panoramic Everest sunrise views
→ Stunning views of Everest, Lhotse, Nuptse, Ama Dablam, and more
→ Walk through Sagarmatha National Park, a UNESCO World Heritage Site
→ Stay in authentic Himalayan tea houses
Himalayan Culture and Sherpa Villages
⇒ Namche Bazaar (3,440 m): Bustling Sherpa towns where you can learn about local traditions, buy trekking gear, and enjoy cultural exchanges.
⇒ Tengboche Monastery: Visit the most famous Buddhist monastery in the Khumbu region, where you can witness prayer ceremonies and experience Sherpa spirituality.
⇒ Khumbu Region Villages: Experience the warm hospitality of the Sherpa people as you pass through picturesque villages like Phakding, Dingboche, and Pheriche.
Why Choose Our Everest Base Camp Trek?
We are a trusted and experienced local trekking company in Nepal, dedicated to providing safe, memorable, and professionally organized Himalayan adventures. Our Everest Base Camp Trek package includes:
→ Experienced licensed trekking guide
→ Friendly and reliable porters
→ Domestic flights (Kathmandu – Lukla – Kathmandu)
→ All necessary trekking permits
→ Tea house accommodations during the trek
→ Worker insurance and safety management
→ Personalized service with reasonable pricing
→ Our experienced team ensures proper acclimatization, safety, and full support throughout the journey, allowing you to enjoy the trek with confidence and peace of mind.
Everest Base Camp and Gorak Shep
⇒ Everest Base Camp (5,364 m): Stand at the foot of the towering Everest and feel the exhilaration of reaching this historic site.
⇒ Gorak Shep (5,140 m): A small settlement where you’ll rest before heading to Base Camp and later on, hike up to Kala Patthar for unforgettable views.
Nature and Wildlife
⇒ Sagarmatha National Park: The trek passes through this UNESCO World Heritage site, known for its diverse flora and fauna. You might spot blue sheep, musk deer, and yaks.
⇒ Rhododendron Forests: Depending on the season, the trek is beautifully complemented by blooming rhododendron flowers, especially in lower altitudes.
Best Time to Trek Everest Base Camp
⇒ Pre-monsoon (March to May): The best time to trek, with clear skies and moderate temperatures. The Rhododendron forests bloom and the weather is ideal for mountain views.
⇒ Post-monsoon (September to November): Also a great time for trekking, with crisp air and clear skies. It’s slightly colder than the pre-monsoon season but still very manageable.
Acclimatization and Health Tips
⇒ Acclimatization Days: The trek is at high altitudes, so acclimatization is crucial. Make sure to follow the principle of “climb high, sleep low” to avoid altitude sickness.
⇒ Hydration and Rest: Drink plenty of water and get enough rest. Carry a water purification system (tablets or filters) to ensure safe drinking water along the route.
⇒ Altitude Sickness: Be aware of the symptoms headaches, dizziness, nausea and descend immediately if they worsen.
Trek Distance & Difficulty
The total trekking distance of the Everest Base Camp Trek is approximately 130 kilometers (80 miles) round trip from Lukla. The route is considered moderately challenging and suitable for trekkers with good physical fitness and a positive attitude. Daily walking hours range from 5 to 7 hours, with gradual altitude gain for proper acclimatization.
Packing Essentials Clothing:
⇒ Warm layers: thermal tops, down jackets, and fleece.
⇒ Trekking pants, waterproof jackets, and a hat and gloves.
⇒ Light, moisture-wicking clothes for the lower elevations.
⇒ Footwear: Well-fitting, waterproof trekking boots with good ankle support.
⇒ Sleeping Gear: A comfortable sleeping bag rated for cold temperatures and a lightweight, portable tent if needed (if trekking during off-season or using teahouses).
⇒ Other Essentials: A good quality backpack, water bottle, trekking poles, camera, power bank, first-aid kit, and a headlamp.
Guide and Porter
⇒ Hiring a Guide: While not mandatory, hiring a guide is highly recommended. They offer invaluable local knowledge, help with navigation, and ensure your safety.
⇒ Hiring a Porter: Porters help carry your heavy luggage, allowing you to focus on the trek. It’s common to hire a porter to carry 15-20 kg.
What to Expect Along the Trek
- Teahouses: Most trekkers stay in teahouses along the route. These small inns provide meals (mostly Dal Bhat, Tibetan bread, and local dishes) and a warm place to sleep. Expect basic but comfortable facilities.
- Electricity and Wi-Fi: Some teahouses offer Wi-Fi, but it’s slow and expensive. Charging devices can be done in some villages for a small fee.
- Remote Locations: The trek passes through remote villages, so amenities like hot showers, toilets, and reliable communication may not always be available.
Safety Precautions
- Travel Insurance: Ensure your travel insurance covers high-altitude trekking (above 3,000m) and emergency evacuation in case of illness or injury.
- Weather Conditions: Check weather forecasts frequently, especially for flights between Kathmandu and Lukla, as these can be delayed or canceled due to poor weather.
- Altitude Sickness Awareness: Monitor your health closely during the trek. If you feel symptoms of altitude sickness, descend to lower elevations immediately.
Post-Trek Experience for EBC
- Kathmandu: After returning from the trek, enjoy a relaxing day or two in Kathmandu, exploring its vibrant cultural heritage, temples, and streets. Visit the historic Swayambhunath Stupa (Monkey Temple) or the Boudhanath Stupa for a peaceful experience.
- Celebration: Share stories and celebrate your successful trek at one of the many cafes and restaurants in Thamel.
- The Everest Base Camp Trek is more than just a trek; it’s a transformative journey through Nepal’s majestic mountains, rich culture, and breathtaking landscapes. Whether you're drawn by the challenge, the stunning views, or the desire to immerse yourself in Sherpa culture, this adventure is sure to stay with you for a lifetime. Plan well, respect the mountains, and enjoy every step of the way!
Everest Base Camp Trek Itinerary:
Day 01: Arrival in Kathmandu – Welcome Program & Trip Preparation
Upon your arrival at Tribhuvan International Airport in Kathmandu, a representative from Himalayan Magic Treks will warmly welcome you and transfer you to your hotel. After check-in and some rest, we organize a short trip briefing covering the Everest Base Camp Trek itinerary, safety information, and final preparation for the adventure ahead. You will also have time to check your trekking equipment and explore the vibrant atmosphere of Kathmandu.
Day 02: Flight from Kathmandu to Lukla – Trek to Phakding overnight at Tribeni Lodge
The Everest Base Camp adventure begins with an exciting scenic flight from Kathmandu to Lukla, offering spectacular aerial views of the Himalayas. Upon landing at Lukla Airport (2,860 m), the trek officially starts with a gentle walk through beautiful Sherpa villages, prayer flags, and pine forests alongside the Dudh Koshi River. After approximately 3–4 hours of trekking, you will reach the peaceful village of Phakding (2,610 m) for an overnight stay in a cozy tea house.
Day 03: Trek from Phakding to Namche Bazaar 3440 m
Today’s trek follows the beautiful Dudh Koshi River through pine forests, traditional Sherpa villages, and several suspension bridges decorated with colorful prayer flags. After entering Sagarmatha National Park at Monjo, the trail gradually climbs toward Namche Bazaar, the vibrant gateway to the Everest region. Along the way, trekkers enjoy the first distant views of Mount Everest and surrounding Himalayan peaks. Overnight stay at a tea house in Namche Bazaar (3,440 m).
Day 04: Acclimatization Day in Namche Bazaar
Today is an important acclimatization day in Namche Bazaar to help your body adjust to the higher altitude. You can enjoy a short hike to Everest View Hotel or nearby viewpoints for stunning panoramic views of Mount Everest, Ama Dablam, Lhotse, and other Himalayan peaks. After the hike, explore the lively Sherpa town of Namche Bazaar, visit local markets, cafés, museums, and experience the unique mountain culture. Overnight stay at Namche Bazaar.
Day 05: Trek from Namche Bazaar to Tengboche (3,860m)
The trek from Namche Bazaar to Tengboche offers some of the most spectacular mountain scenery in the Everest region. The trail follows a scenic path with breathtaking views of Mount Everest, Ama Dablam, Lhotse, and Thamserku before descending to the Dudh Koshi River and climbing through rhododendron forests to Tengboche. This beautiful village is home to the famous Tengboche Monastery, the largest and most important monastery in the Khumbu region. Overnight stay at Tengboche with stunning Himalayan surroundings.
Day 06: Trek from Tengboche to Dingboche (4,360 m)
Today’s trek continues through beautiful alpine landscapes with magnificent views of Ama Dablam, Island Peak, and surrounding Himalayan ranges. The trail passes through traditional Sherpa villages, crossing the Imja Khola River before gradually ascending to the peaceful village of Dingboche. Surrounded by stunning mountain scenery and stone-walled fields, Dingboche is an important acclimatization stop on the Everest Base Camp Trek. Overnight stay at Dingboche.
Day 07: Acclimatization Day in Dingboche
Today is another important acclimatization day to help your body adjust to the increasing altitude. A short hike to Nagarjun Hill or nearby viewpoints offers spectacular panoramic views of Makalu, Lhotse, Ama Dablam, and other Himalayan peaks. After the hike, trekkers can relax and enjoy the peaceful mountain atmosphere of Dingboche while preparing for the higher elevations ahead. Overnight stay at Dingboche.
Day 8: Trek from Dingboche to Lobuche (4,940m)
Today’s trek gradually ascends through rugged alpine terrain with incredible views of towering Himalayan peaks and glacial landscapes. The trail passes through Dughla before climbing to the memorial site dedicated to climbers who lost their lives on Everest expeditions. From here, the route continues alongside the Khumbu Glacier to the small settlement of Lobuche. Overnight stay at Lobuche surrounded by dramatic mountain scenery.
Day 9: Trek from Lobuche to Gorak Shep (5,140m) and Everest Base Camp (5,364m)
Today is one of the most exciting and memorable days of the Everest Base Camp Trek. The trail follows rocky glacial paths alongside the Khumbu Glacier before reaching Gorak Shep, the last settlement before Everest Base Camp. After a short rest and lunch, the trek continues to the legendary Everest Base Camp (5,364m), surrounded by towering Himalayan peaks and dramatic ice formations. After celebrating this incredible achievement and enjoying the breathtaking scenery, return to Gorak Shep for an overnight stay.
Day 10: Trek from Gorak Shep to Kala Patthar (5,545m) and Down to Pheriche (4,240m)
Early in the morning, hike from Gorak Shep to Kala Patthar, the best viewpoint of the Everest region, to witness a breathtaking sunrise over Mount Everest and surrounding peaks including Lhotse, Nuptse, and Ama Dablam. After enjoying the panoramic Himalayan views, descend back to Gorak Shep for breakfast and continue trekking down to Pheriche. The descent offers a more relaxed walk through beautiful alpine landscapes. Overnight stay at Pheriche.
Day 11: Trek from Pheriche to Namche Bazaar
Today’s journey is a long but rewarding descent back toward the lower Everest region. The trail follows familiar alpine valleys, passing through Pangboche, Tengboche, and lush rhododendron forests with continuous views of Ama Dablam and surrounding peaks. After crossing suspension bridges and descending alongside the Dudh Koshi River, you gradually arrive back at the vibrant Sherpa town of Namche Bazaar. Overnight stay at Namche Bazaar.
Day 12: Trek from Namche Bazaar to Lukla
Today marks the final trekking day of your Everest Base Camp adventure. The trail descends steadily from Namche Bazaar, passing through beautiful Sherpa villages, suspension bridges, and lush forests along the Dudh Koshi River. After crossing Monjo and Phakding, you continue the gentle walk back to Lukla. Upon arrival, celebrate the successful completion of your journey to Everest Base Camp with your trekking crew. Overnight stay at Lukla.
Day 13: Fly Back from Lukla to Kathmandu – Farewell Dinner
After an unforgettable Himalayan adventure, take a scenic morning flight from Lukla back to Kathmandu, enjoying final aerial views of the Everest region. Upon arrival, you will be transferred to your hotel for rest and relaxation. In the evening, join a special farewell dinner organized by Himalayan Magic Treks to celebrate the successful completion of your Everest Base Camp journey and share memories of the trek with your team.
Day 14: Departure from Kathmandu
After completing your memorable Everest Base Camp Trek, you will be transferred from your hotel to Tribhuvan International Airport for your onward destination. Our team will assist you with a smooth departure, bidding you farewell with warm wishes and hoping to welcome you again for another Himalayan adventure.
Everest Base Camp Trek difficulty
The Everest Base Camp Trek is considered a moderately difficult trek, but it can vary depending on your fitness level, experience, and the altitude at which you’re trekking. Here’s a breakdown of the different factors contributing to the difficulty of the trek:
1. Altitude and Acclimatization
→ The trek reaches 5,364 meters (17,598 feet) at Everest Base Camp, and some trekkers go up to Kala Patthar (5,545 meters / 18,192 feet) for the best panoramic views of Mount Everest.
→ As you approach higher altitudes, the air becomes thinner, making it harder to breathe. Proper acclimatization is crucial to avoid acute mountain sickness (AMS). The trek typically includes acclimatization days to help your body adjust to the altitude, but it's important to listen to your body and descend if symptoms of altitude sickness occur.
2. Duration and Hiking Conditions
⇒ Trek Duration: The trek usually takes around 12 to 16 days, depending on your pace and acclimatization needs. The trek involves long days of walking, with distances of 5-7 hours on average each day. This requires a good level of fitness, especially for the continuous uphill climbs and descents.
⇒ Terrain: The trail is a mix of well-trodden paths, stone steps, rocky terrain, and narrow trails that follow the contours of the mountains. Some sections can be steep, particularly as you ascend higher, like the climb up to Namche Bazaar and the final push to Kala Patthar.
⇒ Weather: The weather can be unpredictable, especially at higher altitudes. You may encounter freezing temperatures, snow, rain, or strong winds. Cold temperatures can make the trekking conditions more challenging, particularly during early mornings or evenings.
3. Physical Fitness
• Cardio Endurance: Although the trek is not technically demanding (no mountaineering skills required), you will need good cardiovascular endurance. The constant uphill trekking, especially as you ascend to higher altitudes, requires stamina and endurance.
• Strength and Agility: You’ll be navigating rocky, uneven trails and negotiating steep ascents and descents, so it’s important to have strong legs and good balance.
• Daily Trekking Hours: On average, you’ll be trekking for 5 to 7 hours each day, with some long days and more challenging sections. You should be prepared for consistent, moderate physical exertion.
4. Weather Conditions
⇒ Cold Temperatures: At Everest Base Camp and higher up, temperatures can drop well below freezing, especially at night. Even in the trekking season (Spring and Autumn), temperatures can range from -10°C to -20°C (14°F to -4°F) at higher elevations.
⇒ Unpredictable Weather: Sudden weather changes can occur, particularly in the high mountains. Conditions can vary from sunny and warm to cold and stormy, making it important to bring proper clothing and gear to handle diverse weather situations.
5. Trekking Infrastructure
⇒ Teahouses: While the trek passes through many villages with teahouses offering food and shelter, accommodations can be basic, especially at higher altitudes. The standard of services can decrease as you go higher, with limited electricity, hot showers, and other facilities.
⇒ Limited Amenities: Basic facilities like bathrooms may not always be available, especially in more remote areas, and some teahouses have shared bathrooms. Expect basic living conditions as you trek higher up, with some days of more rugged facilities.
6. Mental Toughness and Motivation
⇒ Mental Challenge: The trek can be mentally challenging due to the long hours of walking, unpredictable weather, and sometimes exhausting ascents. Staying motivated, focusing on your goals, and enjoying the surrounding natural beauty will be key to overcoming these challenges.
⇒ Isolation: While the trekking route is popular, there can be times when you’ll feel isolated in the mountains, especially on some remote stretches. Staying mentally prepared and positive is crucial for completing the trek.
7. Common Difficulties and Challenges
⇒ Altitude Sickness: As you ascend, the risk of altitude sickness increases. Headaches, dizziness, nausea, and fatigue are common symptoms. It's vital to listen to your body and take rest days for acclimatization if needed. If symptoms worsen, descending to lower altitudes is essential.
⇒ Long and Steep Climbs: Some sections of the trek, such as the climb up to Namche Bazaar and the final push to Kala Patthar, can be physically demanding with steep inclines.
• Weather Delays: The weather can delay flights to and from Lukla, causing logistical challenges. Weather in the high mountains can also cause unpredictable conditions.
Is the Everest Base Camp Trek Difficult:
The Everest Base Camp Trek is moderately difficult, but it's achievable for those in good physical condition with proper preparation. The major challenges are the altitude, the long duration, and the physical demands of the trek. With proper planning, pacing, and acclimatization, the trek is within the reach of most reasonably fit individuals, even if they don’t have previous high-altitude trekking experience.
The incredible views of Mount Everest, the experience of Sherpa culture, and the sense of accomplishment when you reach Base Camp make the trek a truly rewarding challenge.
Everest Base Camp Trek Cost
The Everest Base Camp Trek is a bucket-list adventure, and while it offers incredible experiences, it also requires careful budgeting. The overall cost depends on several factors such as your travel style, the level of comfort you seek, and whether you opt for a guided trek or choose to do it independently. Here's a breakdown of the typical costs associated with the trek:
⇒ Domestic Flight to Lukla (Round Trip): The flight to Lukla is a significant part of the cost, as it's the gateway to the Everest region. Cost Around $257 x wyas = $514 (round-trip)
⇒ Trek Permits and Fees
→ Sagarmatha National Park Permit: $20 - $22
→ Khumbu Pasang Lhamu Rural municipality Permit: $20 - $22
Accommodation Costs
→ Teahouses: Accommodation along the trail typically ranges from basic to moderate. Expect to pay for teahouse stays along the route:
→ Lower Altitudes (Phakding, Namche Bazaar): Around $5 - $10 per night per person.
→ Higher Altitudes (Dingboche, Lobuche, Gorak Shep): Around $10 - $20 per night per person.
→ The price can be higher during the peak trekking season (spring and autumn) due to increased demand.
Food and Water
→ Meals: Expect to pay $5 - $7 per meal at lower altitudes, with prices increasing at higher altitudes due to the remoteness of the location.
o Breakfast: $5 - $7
o Lunch / Dinner: $10 - $15
Guide and Porter Costs
⇒ Guide: Hiring a guide for the trek is a good option for safety, navigation, and cultural insights. A local guide usually charges around $25 - $30 per day.
⇒ Porter: If you hire a porter to carry your bag (usually 15-20 kg), the cost will be around $18 - $20 per day.
⇒ Extra for Charging Devices/Internet: Charging your phone, camera, or other devices at teahouses costs around $2 - $5 per hour. Wi-Fi, if available, can cost $3 - $5 per hour at higher altitudes.
⇒ Hot Showers: Hot showers can cost anywhere from $3 - $5 depending on altitude and teahouse availability.
⇒ Travel Insurance It's highly recommended to get travel insurance that covers high-altitude trekking, medical evacuation, and other unexpected events Average cost: $50 - $150 for a 2-week trek, depending on the policy and coverage.
⇒ Total Budget Estimate: $1,800 - $2,700 for a 14-day trek
⇒ Total Mid-Range Estimate: $2,700 - $3,800 for a 14-day trek.
⇒ Total Luxury Estimate: $3,800 - $5,500 for a 14-day trek.
Clothing and Layering System
The weather in the mountains can change rapidly, so layering is key. You need to stay warm while also having the ability to shed layers when needed.
Base Layers (Moisture-Wicking Layer)
⇒ Top: Moisture-wicking thermal shirt (Merino wool or synthetic material)
⇒ Bottom: Moisture-wicking thermal leggings (Merino wool or synthetic)
→ Fleece Jacket or Softshell Jacket: Helps to retain body heat.
→ Down Jacket: A lightweight down jacket for warmth during breaks or in cold weather.
→ Waterproof Jacket: Windproof and waterproof shell jacket to protect against rain, snow, and wind.
→ Waterproof Pants: Light and breathable waterproof pants for protection during rain or snow.
→Hat: Warm beanie or wool hat to protect your head from cold temperatures.
→ Sun Hat/Cap: For sun protection at lower altitudes and on sunny days.
→ Neck Buff: A versatile piece of cloth that can be used as a neck gaiter, face mask, or headband for warmth and protection from dust and sun.
→ Lightweight Gloves: For warmth during the daytime at lower altitudes.
→ Insulated Gloves: Thicker, insulated gloves for higher altitudes (especially for early mornings and evenings).
→ Waterproof Gloves: To keep your hands dry in case of snow or rain.
→ Trekking Boots: Waterproof, sturdy, and breathable boots with good ankle support for rocky, uneven terrain. Make sure they’re well broken-in before the trek.
→ Camp Shoes: Lightweight shoes or sandals (like flip-flops) for wearing in the evening at teahouses after a long day of trekking.
→ Socks: Several pairs of moisture-wicking socks (preferably Merino wool or synthetic) for comfort and to avoid blisters. Bring both thin and thick pairs depending on the weather.
Gaiters
→ Gaiters: Protect your legs and boots from snow, water, or debris, especially in higher altitudes or during snowy conditions.
→ Sleeping Bag: A 4-season sleeping bag rated to around -10°C (14°F) or lower, since temperatures can drop below freezing at higher altitudes.
→ Sleeping Bag Liner: Optional, for extra warmth and hygiene.
→ Main Backpack: A 50-60L backpack is ideal for carrying your personal gear. It should be comfortable, lightweight, and durable.
→ Daypack: A smaller 20-30L pack for carrying essentials on shorter day hikes or excursions.
→ Trekking Poles: Adjustable trekking poles provide stability, reduce strain on your knees, and help with balance on steep sections.
→ Water Bottles or Hydration Bladder: Carry at least 2 liters of water capacity (make sure they’re insulated if you're trekking in cold weather to prevent freezing). Consider a water filter or purification tablets to refill along the way.
→ Energy Bars/Trail Mix: Carry high-energy snacks like granola bars, nuts, chocolate, or dried fruit for an energy boost during the trek.
→ Toothbrush/Toothpaste
→ Biodegradable Soap/Hand Sanitizer
→ Toilet Paper: Carry your own toilet paper as it might not be available in some remote areas. Consider wet wipes for quick cleaning.
→ Towel: A lightweight, quick-dry towel.
→ Lip Balm and Sunscreen: The sun can be intense at high altitudes, so bring high SPF sunscreen and lip balm with SPF.
→ Basic First Aid Kit: Include pain relievers (ibuprofen or aspirin), adhesive bandages, blister pads, antiseptic cream, gauze, and any personal medications.
→ Altitude Sickness Medicine: Consult your doctor before the trek to get recommendations for altitude sickness prevention (e.g., Diamox).
→ Sunglasses: UV-protected sunglasses with a high UV rating (100% UV protection) to protect your eyes from the intense sun and glare on snow.
→ Goggles: In case of snowstorms or extreme weather at higher altitudes.
→ Maps: Download offline maps or bring a physical map of the Everest region.
→ Power Bank: Bring a portable charger to keep your phone and other electronics charged, especially if you’re relying on them for navigation or emergency communication.
→ Headlamp or Flashlight: A headlamp is essential, as you’ll likely start trekking early in the morning or may need to walk in the evening.
→ Passport: Necessary for trekking in Nepal.
→ Permits: Carry the TIMS Card and Sagarmatha National Park Permit (you can also leave copies with your guide).
→ Cash: Small denominations in Nepalese Rupees for small expenses along the trail (don’t rely on ATMs once you leave Lukla, as they’re rare).
→ Camera/Smartphone: For capturing the stunning views and memories.
→ Notebook/Journal: For documenting your journey.
→ Earplugs and Eye Mask: To help with sleep in busy teahouses or noisy areas.
→ Trash Bags: Carry your waste out (including toilet paper and hygiene products) to keep the environment clean.
→ Down Pants or Insulated Leggings: Helpful for extra warmth at higher altitudes.
→ Compression Bags: For compressing your clothing and saving space in your backpack.
→ Portable Water Filter or Sterilizing Tablets: To purify water if you don’t want to buy bottled water at higher prices.
→ Pack Light but Smart: You need to balance between having all the essentials and packing light, as carrying excess weight will slow you down.
Guide for Everest Base Camp Trek
Hiring a guide for the Everest Base Camp Trek is a great decision, especially if you're unfamiliar with the terrain, high-altitude trekking, or navigating the cultural nuances of the region. A guide not only helps ensure your safety and enhance your experience, but they also provide cultural insights, navigate the best route, and assist in case of emergency. Here’s a comprehensive guide to hiring and preparing for a guide on your Everest Base Camp Trek:
A Once in a Lifetime Himalayan Adventure
The Everest Base Camp Trek is more than just a trekking holiday — it is a life-changing journey through the world’s most famous mountain landscape. From breathtaking Himalayan panoramas to rich Sherpa traditions and the achievement of standing at Everest Base Camp, every moment of this trek becomes a lasting memory.
Choose your Everest adventure today and experience the magic of the Himalayas with expert local guides and unforgettable mountain hospitality.